Bottle ExplosionBy: Spatula Tzar |
I've seen numerous articles detailing the construction of pressure devices, but they all involve the risky maneuver of pressurizing the container to the bursting point. Instead, I will attempt to pressurize a bottle to a safe level, then explode it externally.
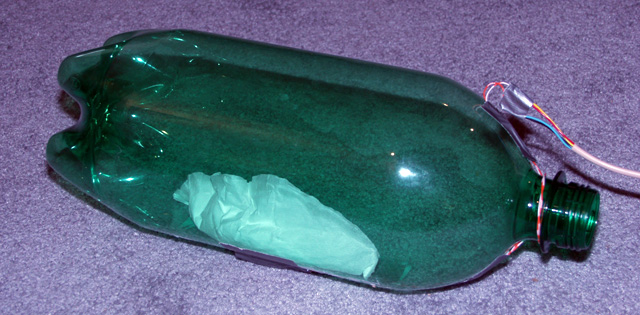 |
For this experiment, I will be pressurizing a three liter pop bottle with 690 kPa of CO2, well within the 1,030 kPa limit. To create the gas, I will be using this chemical reaction: NaHCO3(s) + HCl(aq) → CO2(g) + H2O(l) + NaCl(aq) This has two advantages over the popular HCl + Al method: it produces twice as many moles of gas per mole of acid, and it is endothermic. Because no heat is evolved, it will not prematurely degrade the plastic bottle, and ensures no hot liquids will be dispersed. |
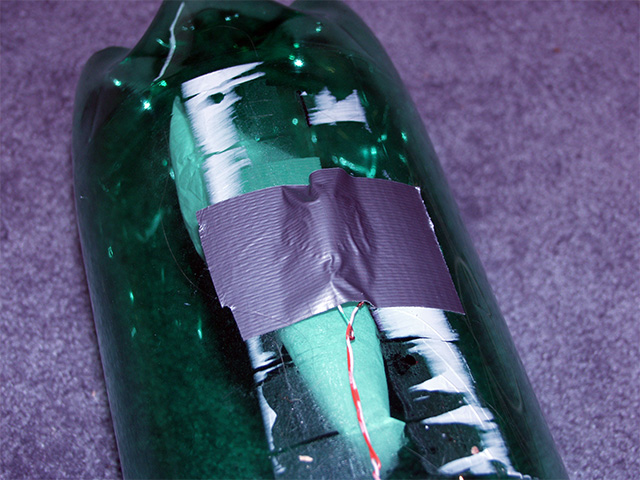 |
If all goes well, the bottle will not explode from internal pressure alone. To set it off, I taped a small charge of acetone peroxide to the side. This will provide enough energy to breach the wall, allowing the gas to escape in a most rapid fashion. I later attached a second charge to serve as a backup. The bottle will contain a great deal of potential energy, and poses a hazard if it does not explode as intended. I for one would not like to retrieve it. This turned out to be a very wise, as the first charge did in fact fail. |
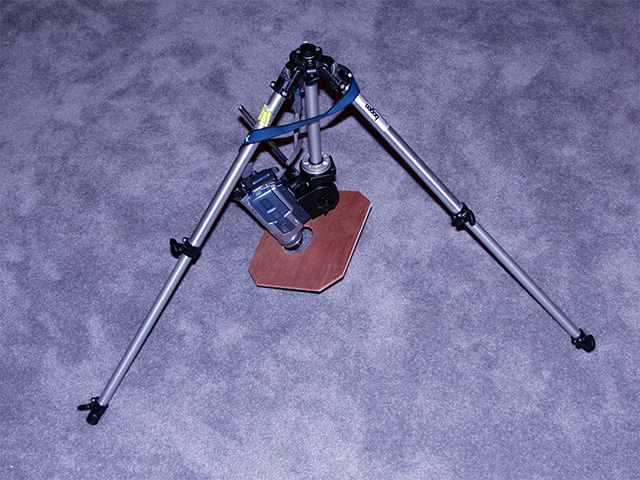 |
Here we have my camera, mounted on my fancy Bogen tripod. Tripods are essential for image stability, and allow the operator to distance themselves from hazardous experiments. The camera is mounted upside down, positioned to view the bottle at the bottom of my blast pit. |
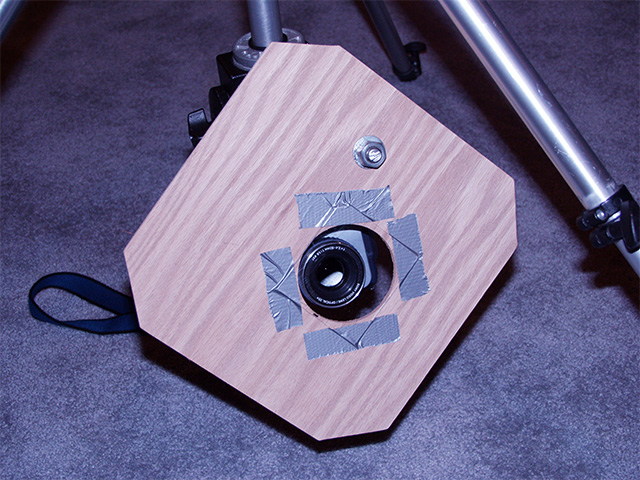 |
In my experience, cameras don't like being hit with plastic shrapnel. They get very annoyed, and start displaying obscure lines over the image. Sources tell me such behavior is a symptom of "scratches", a disease common to optical imaging equipment. To preserve visual acuity, cameras must be equipped with an impact resistant shield. I made mine out of a few scrap materials. The wood serves to protect the camera body, while a small square of polycarbonate shields the fragile lens. While polycarbonate scratches more easily than other materials, it wont shatter like acrylic or glass. Scratches are the enemy of photography, so expect to replace the plastic after every blast. |
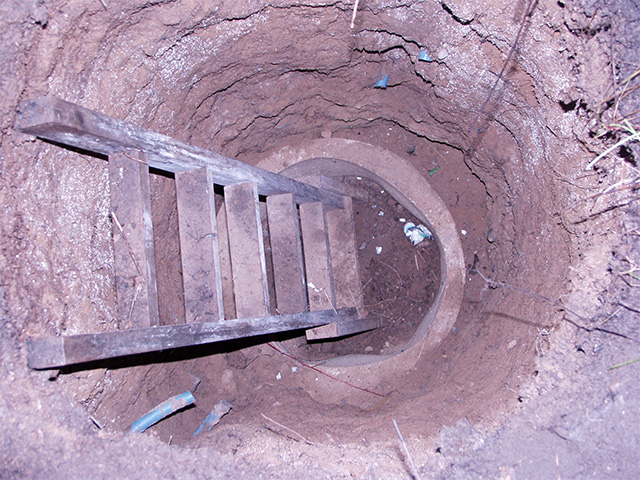 |
This is where I will be performing the experiment: three meters underground. Originally I had intended to line the entire hole with concrete, but laziness quickly took over. Besides, frozen dirt is just as impermeable as concrete. |
Now, after I've wasted all your time with boring details, you may finally watch my video. I would have removed the unsightly ladder from the frame, had it not been embedded in the frozen ground. | |
 |
The fog cloud was truly amazing. Depressurizing a gas is endothermic, so the cold CO2 must have mixed with the water, condensing it a manner quite similar to dry ice. I marveled at its persistence. Despite the turbulent vortices, it was not particularly windy at the time, and the dense cloud remained completely opaque for a full ten minutes. It made a wonderful natural fade effect for my video. I will definitely do this again, if for nothing more than the fog cloud. |
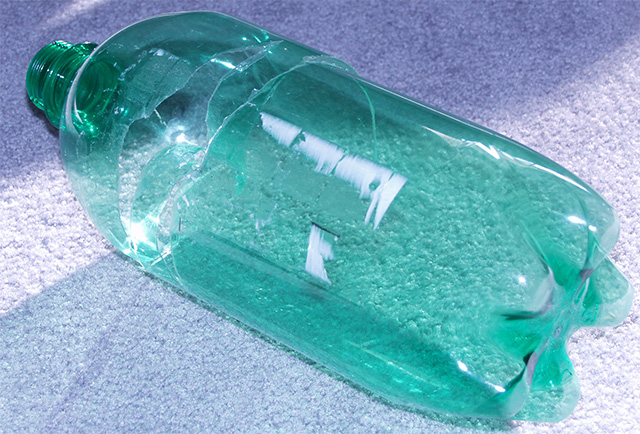 |
Surprisingly, the bottle survived nearly unscathed. Not a bit of shrapnel was created. Indeed, it appears the structural damage was caused almost entirely by the primary charge. The plastic was pushed inward, shearing a seam wide enough to allow for rapid depressurization. Although not pictured, the cap remained sealed on the bottle. |
Well, that's it. Really. I'm done now. You can go back and look at my other projects if you want, but I don't have anything more to say about the bottle explosion. Go now. Shoo.
Bitcoin: 1KEWmWK3Sn9ToEHxhXmoXax6ycNGgLMfLv