NES RepairBy: Spatula Tzar |
One dreary evening, my poor little Nintendo stopped working. It suddenly wouldn't boot. No scrambled graphics, no flashing red light: simply a solid grey screen. After trying the usual tricks to get it working, I decided on a more intimate approach.
I removed the case, and began probing the board with my oscilloscope. I noticed something very peculiar when testing the data lines of the cartridge. They would flicker as if sending data like normal, but only for a few seconds after powering up, at which point they would suddenly stop. Turning the board over to inspect the components side, I immediately saw--or rather felt--the problem.

One of the two SRAM chips was hot. Scorching. I immediately knew I found the problem. |
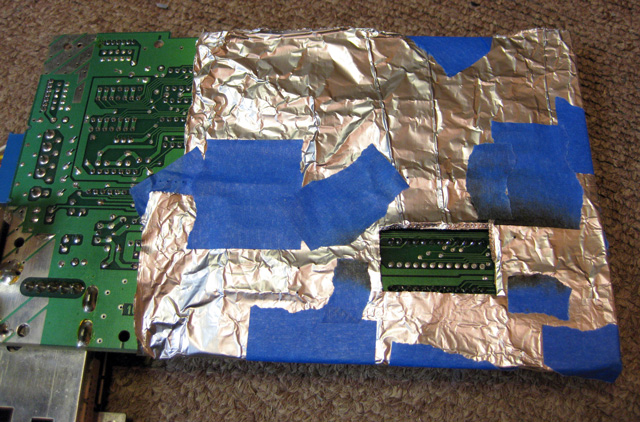
The Bad Chip needed to be replaced. Integrated circuits are always a pain to desolder. Sure I could take my iron and poke away at all the joints dozens of times until it finally dislodges, or I could remove the whole thing at once with my trusty hot air gun. To protect the other components from damage, I constructed an Impenetrable Aluminum Heat Shield of Science. The shield deflects the flow of hot air, and reflects any infrared radiation produced by the resistive heating element. Now I can desolder the Bad Chip without roasting the rest of the board. |
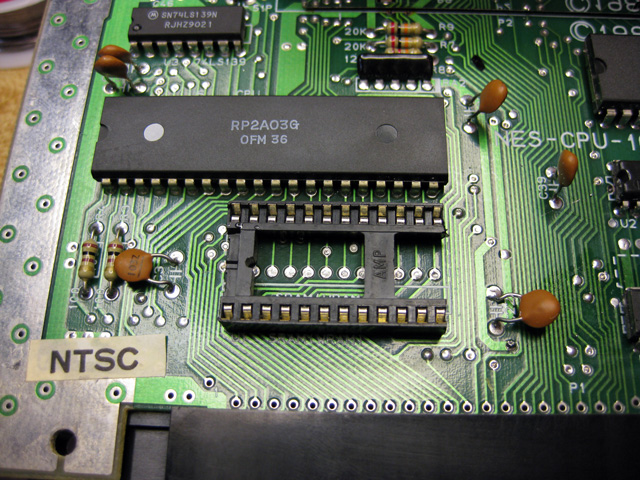
As a gesture of good will, Nintendo was kind enough to place a second set of holes in the circuit board, specifically for this purpose. Or at least I like to think so. Regardless, these extra holes allow a larger 0.6" DIP socket to be placed on the board. |
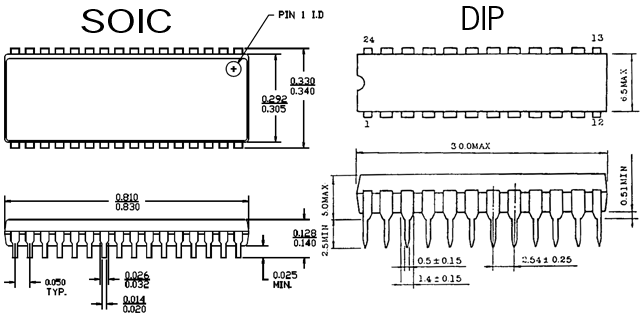
SRAM is cheap and plentiful these days, but it's almost impossible to find any through-hole components in modern electronics. I had to use a surface mount SOIC package instead. If anyone is interested, here are the datasheets for the original and replacement SRAM chips. |

SOIC isn't terribly hard to solder to a circuit board, but it's annoying when doing freehand work. I had to painstakingly strip and solder 32 tiny wires to the leads to create my makeshift SOIC to DIP adapter using .1" header pins. Clever observers might notice the number of pins on the new chip exceed the original. This is because no one makes 2k x 8 SRAM chips anymore; the smallest I could find was a 128k x 8. Fortunately downgrading RAM is easy. Simply tie the unused address lines either high or low, effectively forcing it back to 16 kilobytes. |
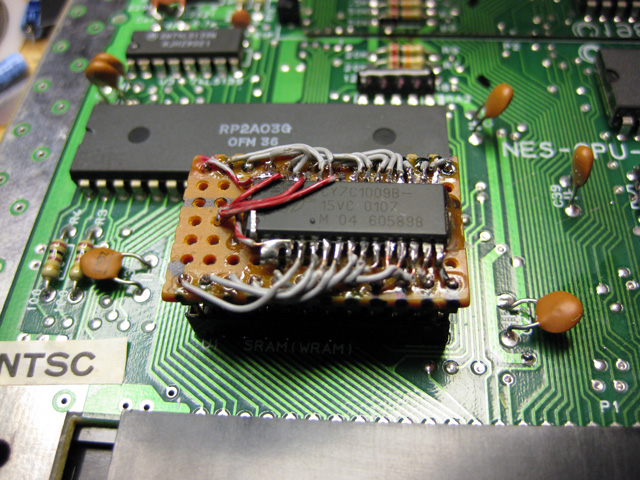
The new chip fits in its socket, exactly how Nintendo originally intended. They even provided enough clearance for the RF shield. |
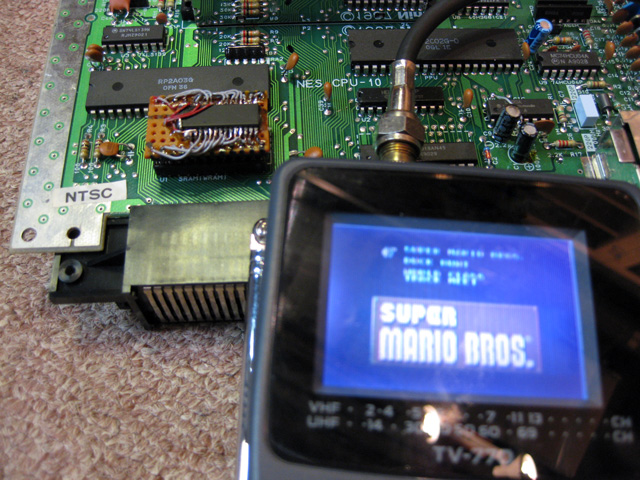
Here it is, fired up and working! The SRAM chips turned out to be the only problem, and it now works just fine. I used an otherwise useless (no thanks to DTV) portable television for testing purposes. |
I quickly reassembled the case, hooked it up, and began a short warping playthrough of Mario. I'm afraid I'm terribly out of practice. I'm ashamed to admit I timed out on the last level. Oh well. I have a feeling Her Royal Highness rather enjoys her fame of constantly being kidnapped.
Bitcoin: 1KEWmWK3Sn9ToEHxhXmoXax6ycNGgLMfLv